

Paul and Kitty Antonik Wakfer had made the decision before going south to Arizona for the dead of winter in January 2005, that upon our return we would leave the Toronto apartment that Paul had occupied for over 10 years (since Oct 1, 1994 - the longest he had ever lived in one place since graduating from university). The owners of the building - the infamous (in Toronto) Wynn Family - had been very lax in maintaining the building and had every year raised the rent for those who stayed while offering apparently area competitive rents to newcomers. While the building was nicely situated in the mostly pleasant Annex section of the city, and the apartment was a good size (enabling us to create a good arrangement for our computer workspaces) and the on the corner of the second floor (providing a nice cross breeze and good view of pedestrian traffic), the lack of adequate maintenance had become increasingly bothersome. (Among the worst: sudsy water backing up in the kitchen sink at all hours even spilling out onto the floor and leaking down into the cabinet by way of an unsealed kitchen sink; bathroom walls and ceiling only partially repaired and unpainted for over 5 years from original leak in apartment above; garage space that flooded with every rain and remained so sometimes for weeks; dirty inside stairwells; and graffiti on outside garage entry walls inviting break-ins - which occurred twice while we were there. The Golden Cockroach repeatedly awarded to the Wynn's by a Toronto renter's group is easily understood by us.)
We had notified Wynn Family Properties by registered mail in March (after leaving them post dated checks through the end of April) that we would be vacating the apartment at 66 Spadina Road at the end of May, and that the one month rent in advance paid in September of 1994 (with no interest returned yearly as required by Toronto law) would cover the May rent.
The pleasures of living in Toronto had also decreased in the previous 3 years - dancing at the clubs had degenerated to mostly hip/hop with far less frequent high energy than before, and there were far more dirt/trash and beggars in the streets and on the sidewalks. Our income didn't permit us to move to a more desirable area (if there really is such a place), and that wouldn't change the greatly reduced availability of good dance clubs. So our cost-benefit analysis concluded that the outlay of our modest funds was not returned with sufficient benefits. Therefore our decision to make the cottage built almost 39 years previously Paul's Canadian residence and our home during the warm months each year.
We arrived back in Toronto in mid April, and by the last week we had started making weekly trips to the cottage to take items there that we would be retaining and bringing items back that we then left for donation at the large downtown Toronto Goodwill collection center. The main purpose of the trips, however, was to get started on the modifications of the cottage that it required in order to make it a more efficient and therefore enjoyable full time residence for 6 months each year.
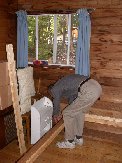
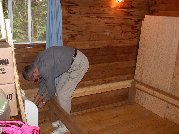
The bed frame that had been built by Paul's daughter and son-in-law in the north bedroom was taken apart and removed so that this room could be used for storage during our renovation period. We have been using the south bedroom but plan to move into the north one when all the work is completed.
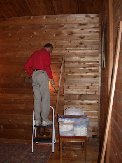
The biggest change planned for the cottage is removal of the wall between the middle bedroom and living room (wall at extreme right in photo), thereby greatly enlarging this space by connecting it to the open living room, dining room and kitchen along the front (west and lake side) of the cottage. This will allow us to enjoy views of (and breezes from) the lake to the west and the woods on the east, as well as be better able to talk to whoever of us is in the kitchen while working at the computers, which will be situated in what is here being called the middle bedroom, but will then be part of the living room. This larger area should also give us much more space to dance!
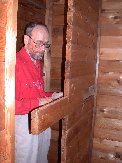
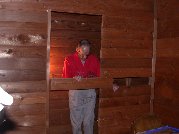
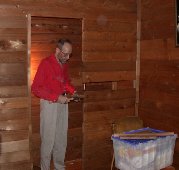
The interior walls are a single thickness of tongue and groove cedar logs and once the nails at the ends that had been driven into the log below ("toe nails") were removed, the log could be easily slid out of place. Paul tried out this method on a log in the short closet (non-bearing) wall that ended at the common livingroom/middle bedroom wall. The narrow width of the closet opening required that the log also be pushed at an angle in order to be removed. From this point, it was a short job to remove all the logs of the middle bedroom closet up to the level where the door frame had been.
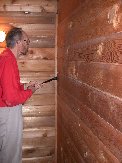
The remainder of this wall is the back of the closet in the south bedroom. Removing the logs here required that they be pulled out, choosing the first one by the fact that a wrecking bar could be just wedged between the end and the outside wall.
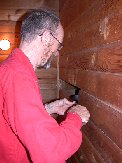
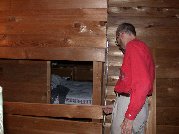
It didn't take too long before our bed in the south bedroom could be seen through the back wall of its former closet and the closet doorway. The once closet doorway has now become a temporary entrance from that bedroom to our office - the former middle bedroom (and through our office, the shortest way to the bathroom), but it will be relocated along the wall toward the front of the cottage (opening further into the living room) with the eventual rebuilding of that wall.
The living room wall removal referred to above could not quickly proceed from the closet wall removal shown (which had been mainly done to get some idea of how the work of log removal would go and to enlarge the office a little at the same time). There was the problem of storing our possessions that needed to be moved from Toronto, some of which would make the trip onto Arizona. Some of the existing space needed to be made more usable even before enlarging the living room to include the computer workspace. And Paul decided that the cottage needed to be leveled before proceeding with that wall work (a major supporting wall).
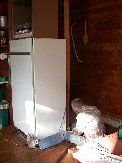
The first change in the kitchen was a move of the outlet for the refrigerator that then permitted the unit to fit more tightly in the corner. This was needed before the planned installation of cabinets, sorely needed for storage.

It was a nice day - relatively free of the infamous cottage country blackflies - and this stump needed removal. The plan was that the vehicle we used for final moving of the big items would be backed up to the porch (from which Kitty took this pic). But a stump remaining from a dead tree cut down many years before was in the way. Paul with his handy axe took it down to chips in fairly short order - and Kitty took a bunch of swings at it too.
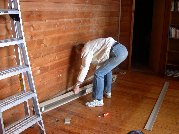
Although this wall will likely not be removed before the end of the summer, taking the baseboard heater off will permit more efficient temporary storage of items coming from the Toronto apartment.
The bed that Paul and Kitty (and he alone before that) used in the south bedroom was quite old, consisted of mattress and box spring and allowed virtually no storage below it. (Our soon to be "lost" king size waterbed in Toronto was atop a frame that Paul had built that allowed a great deal of container storage below. Arranging for comparable storage was a must for the cottage.) Therefore, Paul discarded the box spring (actually we donated it to GoodWill), disassembled the old bed frame and utilized many of the parts in fashioning a platform for the existing mattress.
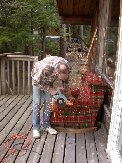
The old bed frame had metal pins that needed to be removed before the wood (which was a good thickness and length) could be used. Paul's saw cut through the metal quickly (the same saw that had been used to build the cottage 39 years previously!).
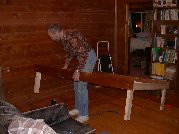
The new frame, having been constructed in the living room, is ready to be put in the bedroom and then the slats installed.
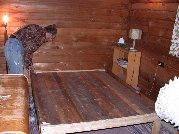
The slats used were those (after a bit of shortening) that were part of the short (to the ground) platform for the original box spring, but now were raise much higher and the mattress would sit directly on them. Note in the top left corner of the picture, on a low bookshelf sits a green-painted lamp that Paul made on a wood lathe in "manual training" in 1950 when he was 12 years old. He has managed to retain a few other things that he made way back then.
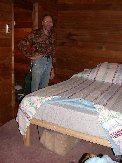
The finished bed is just as comfortable as it was on the old frame and now has the added advantage of container storage space below. All done in one day.
The next day we got back to working in the kitchen - towards creating the much needed, increased and improved work and storage space.
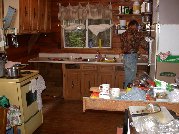
Paul at this point had already removed the counter and partial cabinet that was along the west wall and moved the stove from where it had been near the corner. The empty space in the corner itself had always been an annoyance to Paul when his daughter and son-in-law installed the replacement counters from what had been there originally. Now he was going to do it himself - and right.
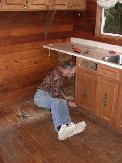
We took many measurements before purchasing two prefabricated floor cabinets by Mill's Pride at Home Depot. The blind cabinet one is to be placed in the empty corner; Paul begins by increasing the height of the existing cabinets.
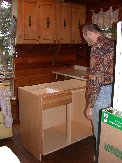
The cabinet was assembled to the point where it is ready for placement.
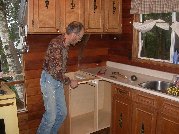
Some muscle was needed to push the cabinet into place.
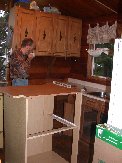
The cabinet was removed when we realized that the existing counter top on the sink cabinets was not high enough to allow for proper placement of the reapplied counter top on the new cabinets.
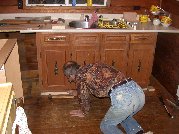
So up goes the old cabinet a bit more. This necessitated lengthening the water inlet plumbing, which we purchased between trips and had ready the next time.
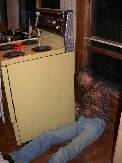
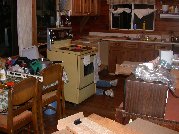
Unable to proceed with the cabinets but there still being time before returning to Toronto the next evening, Paul decided to move onto reconnecting the electric stove in its new location at the end of where the new cabinets would sit below the old counter top.
Because the kitchen floor cabinet installation had not been completed in the original 2 days we had allotted, we made an extra trip - with the car loaded, of course, to make use of every trip to transport items from the very full apartment being vacated.
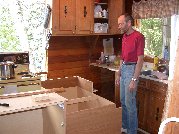
Paul takes a deep breath and a chuckle part way through his modification of the purchased prefabricated blind corner cabinet. He eliminated the planned "blind" wall and extended the floor so that it then turns the corner and ends at the existing wall of the sink base cabinet. Without this there would be a wasted 6 inches - not tolerable to Paul who works to always optimize everything ;>)
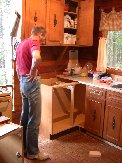
With the corner cabinet in place, Paul's modifications can be better seen. No wasted space for the Wakfers!
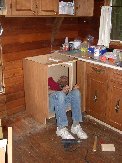
Fitting the filler piece in place required that Paul work inside the cabinet part of the time - not many men can do this.
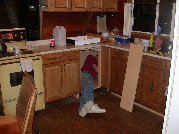
With the other new cabinet and the saved counter top in place, Paul got back to finishing his corner modifications.
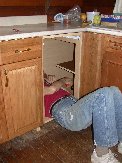
A sky-hook arrangement was devised for additional support to the shelf constructed by Paul to but with supplied one (running the full length of the back of the cupboard) and continue forward around the corner into the extended blind end.
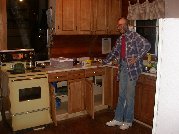
Paul is appropriately pleased at the greatly increased floor cabinets and better arranged counter surface in the cottage kitchen.
 |
 |