
Late Summer - Early Fall 2008
Assorted Home Improvements in Ontario
Having a woodstove in our home here in Ontario is something we have wanted for a long time - long before it became Paul's legal residence rather than the apartment in Toronto we vacated in May 2005. When Paul first built the cottage in the late 1960s, he and his first wife Dagny Vidinsh could not decide where a stove could be located because of the then much smaller living room. Since we did the major change of eliminating the middle bedroom and thereby dramatically opening up the living room, it has only been a matter of getting some other things done first.
Back in 2006 we had picked up a reasonable size wood burning stove at the Harcourt landfill and Kitty put some elbow grease into cleaning it up. A new door gasket was needed and of course getting the chimney installed. We got estimates in 2007 for installation of a chimney for this stove from 2 businesses and learned also that the stove was suficiently old that it would require (by provincial fire regulations) being either a fair distance away from the wall or having fireproofing material placed behind it a considerable distance up beyond the stove itself. We even considered just purchasing the chimney materials and doing this installation ourselves. After reviewing all factors regarding a wood burning stove in the living room location we wanted, we decided to purchase a new small Regency stove from Northern Comfort in Birds Creek (just a short distance north of Bancroft) and have their installers do the work. This way we could have the stove 5.5 inches from our log wall without having to cover it - and have it all completed very quickly.
We had always planned on making a hearth of broken tiles, which we had brought from Arizona in April - ones that had been samples from when Kitty and her former husband Ed Raastad had their house built. So with the decision made and order placed, we had to get busy since it was by then the latter part of August.
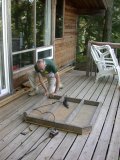
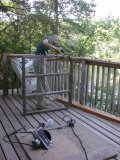
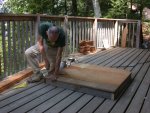 We decided to make the hearth raised about 5 inches since that would put the stove at a level easier to work with and give it an overall more central appearance. Finding the right wood was not difficult since Paul keeps all extra pieces and even ones from disassembly, if they are in good condition - all are organized under the house. We used the minimum size required per the fire code, adjusted for having cut-off corners - 42" deep and 44" wide before the outer 1/2" cedar. The plywood used was a total of 1 3/8" thick (2 different sizes of 5/8" and another 2 of 3/4" thick screwed together) and with the frame of 2x4s it was definitely heavy for even both of us to carry into the house. Before the tiles were cemented on, Paul fitted and screwed in place the outer cedar that matches the wall color.
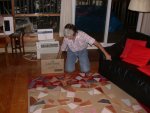
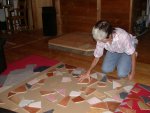
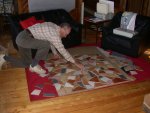 Kitty first broke the tiles into what she considered reasonable sizes and the next day began arranging them on a template the exact size and shape of the hearth top. Paul helped out a bit too.
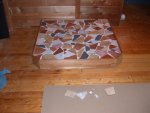 Transferring the pattern of tiles onto the hearth with about 1/4 of the surface at a time covered with the tile cement was a real challenge. It became impossible to get the pieces exactly as they had been on the template, which developed into a real frustration for both of us. Kitty didn't pause to take any photos during that part of the whole hearth making process. All did work out OK in the end, but for a short while we both wished we hadn't begun the task.
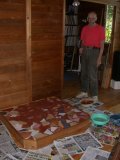 We waited 2 days after the cementing before proceeding with the grout. Paul takes a tea break almost 3/4 way through the grouting, a not time-critical part unlike the cementing of the tiles. Kitty has already begun the initial cleaning of the first 1/4 of the grouting (front right 2/3 and 1/2 along right) that has taken its primary set.
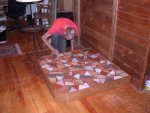 The next day after the grouting had set and received its initial cleaning Paul removes small amount of it and tile cement adhering to outer cedar framing. Kitty carefully washed off the tiles of the small amount of grout film that remained.
 It was a fair amount of work - more than we initially thought would be needed - and even had us frustrated with each other during the cementing, but it all turned out quite well. We're now quite pleased with our hearth, and the stove too.
The 2 lake-facing windows and the 4 in the back near the computers got installed at the end of August, just before we completed the hearth above. In fact, Randy Howe of Paudash Windows had offered us the terra cotta colored grout of which he had a large amount leftover from the tile installation in his own house - and he brought it along when he and his crew did the final work on our windows.
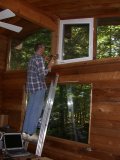
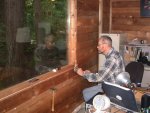
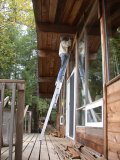
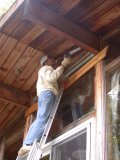
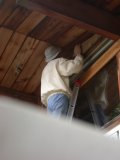 Paul had always planned, from the time he built the cottage over 40 years ago, to sometime get around to finishing off the window perimeters. He didn't like the fact that small cracks were visible and naturally were inlets for small bugs and cold air, even when caulking had been applied - which was unsightly itself. So after the window installations, he used old and new cedar to frame the windows, closing off the small gaps from the inside, and outside too in some cases.
MoreLife is Always "Under Construction"
Initially posted 3/3/2009
Page last updated 5/10/2009
Any questions, comments or suggestions regarding the content of this website
should be addressed at MoreLife Yahoo.
For comments on webpage format, contact Kitty
Antonik Wakfer


 We decided to make the hearth raised about 5 inches since that would put the stove at a level easier to work with and give it an overall more central appearance. Finding the right wood was not difficult since Paul keeps all extra pieces and even ones from disassembly, if they are in good condition - all are organized under the house. We used the minimum size required per the fire code, adjusted for having cut-off corners - 42" deep and 44" wide before the outer 1/2" cedar. The plywood used was a total of 1 3/8" thick (2 different sizes of 5/8" and another 2 of 3/4" thick screwed together) and with the frame of 2x4s it was definitely heavy for even both of us to carry into the house. Before the tiles were cemented on, Paul fitted and screwed in place the outer cedar that matches the wall color.


